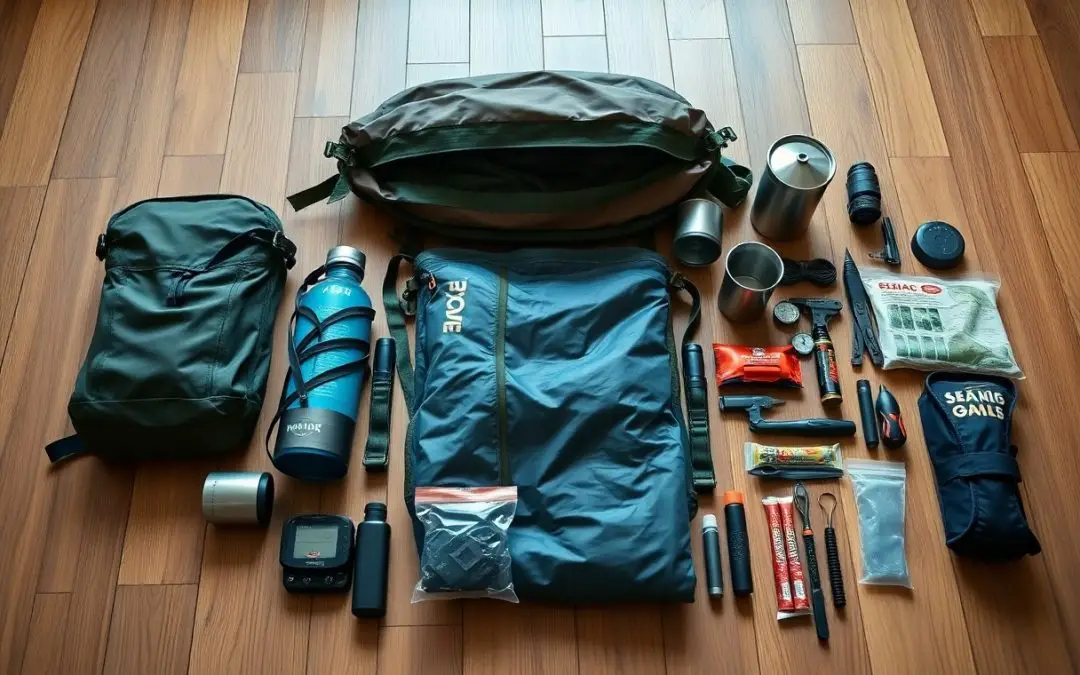
Just pack imperatives that meet your specific needs: compact shelter, water, fire-starting, first aid, multi-tool, and lightweight food; test and refine the kit so you can move quickly and rely on it during emergencies.
Key Takeaways:
- Prioritize necessarys: water, compact food, emergency shelter, first aid, a reliable light source, and a multipurpose tool.
- Choose lightweight, multi-use items and high-efficiency supplies to reduce pack weight without losing functionality.
- Customize contents for local climate, mobility needs, medications, and family size; replace perishable items regularly.
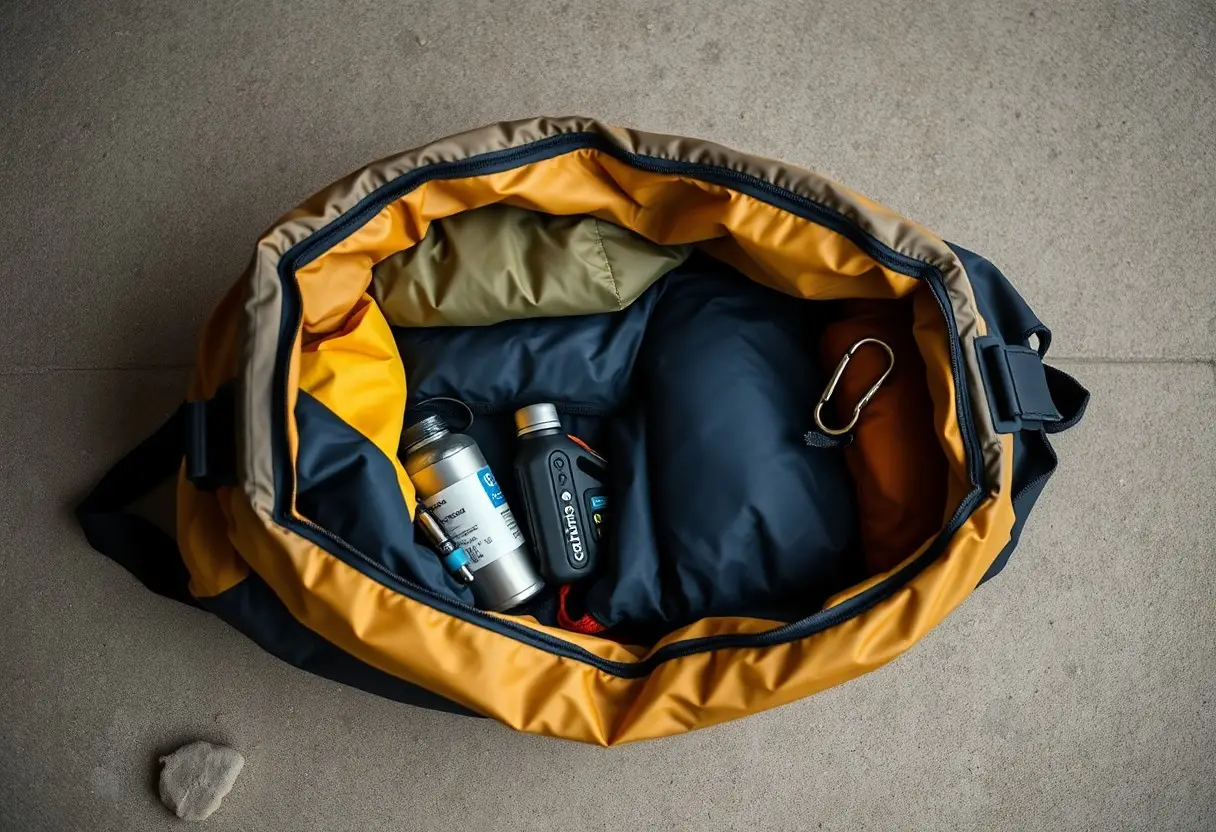
- Organize gear in labeled pouches and position heavy items close to your back to improve comfort and balance.
- Practice carrying the bag, perform quarterly inventory checks, and update documents, cash, and batteries as needed.
Essential Factors for a Practical Go Bag
Pack your go bag to balance weight and usefulness, choosing multi-use tools, compact shelter, and medical supplies that match your needs and mobility.
- Water and purification
- Calorie-dense food
- First-aid kit and medications
- Shelter, insulation, and rain gear
- Light source, fire starters, multi-tool
- Identification, cash, and copies of documents
- Communication and charging options
Assume that you check contents regularly, tailor items for seasonal needs and local risks, and prioritize dual-purpose pieces to keep the kit lightweight.
Defining the 72-hour survival window
You should plan for at least 72 hours of self-sufficiency because emergency response and supply chains can be interrupted; include water (roughly 3L/day), nonperishable food, shelter, and enough medication to cover that period.
Analyzing environmental and regional threats
Assess the specific hazards in your area-flooding, earthquakes, wildfire, extreme heat or cold-so you can choose climate-appropriate clothing, shelter, and protective gear.
Consider how likely infrastructure failures like power outages, road closures, and cell service loss will affect evacuation options and adjust both contents and pack weight so you can move if necessary.
Study local hazard maps, recent incident history, and community alerts so you can prioritize extras such as spare prescriptions, pet supplies, maps, and vehicle tools that match the most probable threats you face.
How to Select a Lightweight Backpack
You want a pack that balances minimal weight with comfortable carry; choose 20-35 liters for a compact go bag and test fit with the load you’ll carry most often, checking strap padding and easy access to importants.
Prioritizing frame geometry and load distribution
Assess how the frame, hip belt, and shoulder straps move weight onto your hips; a low-profile internal frame and snug hip belt keep heavy items off your shoulders so you can carry longer without strain.
Evaluating ultra-lightweight materials and durability
Compare fabrics like Dyneema, ultralight ripstop, and coated nylon to weigh durability against grams saved; you should inspect denier, laminate type, and abrasion resistance before prioritizing weight alone.
Inspect stitching, zipper quality, and reinforcement at stress points; you can trim unneeded features to cut weight, but retain strong attachment points and a reliable hip belt to protect your body during extended use.
Tips for Efficient Water Purification and Storage
Practical water strategies for your go bag focus on treating on the move and storing only what you can carry. You should select compact purification options, designate clean versus treated containers, and carry a small drying cloth plus spare caps. Rotate water and chemical tablets on a schedule to avoid expired supplies.
- Compact pump or straw filters for on-the-spot treatment
- Purification tablets as lightweight backup
- Separate containers for treated and untreated water
- Quick-dry cloth and spare caps for hygiene and sealing
Perceiving the trade-off between capacity and bulk helps you decide whether to carry extra liters or rely on filters and tablets.
Integrating portable filtration systems
Choose a portable pump, straw filter, or hollow-fiber unit rated for bacteria and protozoa; test flow rate and practice backflushing so you can maintain performance in the field. Keep a small syringe or spare cartridge to clear clogs, and store filters in a dry pouch to prevent contamination during transport.
Utilizing collapsible containers for space management
Pack collapsible bottles or bladders that compress when empty to free space; pick BPA-free materials, wide mouths for cleaning, and secure caps to prevent leaks. Use clearly marked volume indicators so you can ration water accurately under stress.
Store empty containers flattened inside soft clothing to save room and protect them; label each with capacity and inspect seals periodically before you head out.
How to Plan High-Calorie Lightweight Rations
You should prioritize calorie density and portability: aim for foods with 400+ calories per 100g when possible and plan according to expected exertion; pack a mix of fats, carbs and proteins so you maintain energy and muscle function during long movement or sheltering periods.
Selecting nutrient-dense, shelf-stable foods
Focus on ready-to-eat items you can grab quickly, like single-serve nut butter pouches, energy bars, jerky, fortified meal replacement powders and dehydrated meal packets that store well without refrigeration.
Minimizing weight through preparation-free options
Pack no-cook choices such as high-calorie bars, dense trail mixes, tuna and nut pouches, and compressed emergency rations you can eat straight from their packaging to avoid carrying cookware or fuel.
Choose items with high calories per ounce and minimal packaging bulk, favor sealed pouches over cans, and portion meals into lightweight resealable bags so you can ration efficiently without added weight or mess.
Strategic Shelter and Warmth Solutions
Shelter choices in your go bag should prioritize compact, high-insulation items that double as emergency cover and heat reflectors, so you can set up quick protection from wind and trap body heat.
Pack items that stack for warmth-an ultralight tarp, insulating pad, and small stove let you build shelter and retain heat without heavy bulk, giving you options when conditions change.
Packing emergency bivy sacks and thermal blankets
Use ultralight bivy sacks and mylar thermal blankets to save weight while retaining heat; you can wrap a bivy over a sleeping pad for insulation and add a blanket for reflective warmth.
Utilizing moisture-wicking apparel layers
Store thin, synthetic base layers and a light midlayer in waterproof sacks so you can access dry clothing when needed and avoid hypothermia from damp garments.
Wear quick-drying fabrics next to your skin; you should avoid cotton, which traps moisture and accelerates heat loss during rest or low activity.
Layer strategically: place moisture-wicking base under insulating pieces and remove midlayers during heavy exertion so you prevent sweat buildup and stay comfortable.
Essential Tools and First Aid Organization
Organize tools and medical supplies into separate, color-coded pouches so you can grab what you need fast; you should prioritize items by frequency of use and potential severity to keep the kit light and effective.
Pack only multi-use gear and compact packaging, cutting duplicates and choosing ultralight alternatives where possible to reduce weight while maintaining capability for common emergencies.
Selecting multi-functional survival hardware
Choose a quality multitool with pliers, a locking blade, and screwdriver options to replace several single-use items and handle repairs, food prep, and shelter tasks with fewer components.
Pair that multitool with a small fixed blade, a lightweight folding saw, and a length of cord for shelter and gear repairs so you can cover heavy-duty and fine tasks without adding bulk.
Assembling a modular medical trauma kit
Build a modular kit with a trauma pouch for hemorrhage control-tourniquet, pressure dressings, hemostatic gauze-and separate modules for burns, fractures, and medications so you can scale treatment to the injury.
Stock each module in clear, labeled compartments and include quick-reference tags so you can act under stress; you should rehearse accessing and applying key items to shave precious seconds during an incident.
Keep resupply items rotated by expiration date and include a checklist so you can replace single-use supplies promptly, and train with the kit periodically to ensure confidence and speed when it matters most.
Summing up
From above you see that a lightweight go bag focuses on imperatives: water, shelter, first aid, light, and tools tailored to your needs. You should prioritize compact, multi-use items, test gear periodically, and adjust contents for seasons and family members. You will carry a practical, less-bulky kit by balancing weight with function and planning for 72-hour self-sufficiency.
FAQ
Q: What is a go bag and how should I prioritize items for a lightweight kit?
A: A go bag is a compact emergency kit designed to sustain you for 48-72 hours while you evacuate or reach help. Prioritize water, shelter, basic first aid, and personal documents, then add lightweight food, clothing layers, and multi-use tools. Balance weight by choosing high-calorie, low-weight food, compact water treatment over heavy bottled water when possible, and replacing single-use items with multi-purpose alternatives.
Q: How do I choose the right bag and packing method to keep weight manageable?
A: Pick a pack sized for 20-35 liters for a light day-to-short-stay kit, with padded shoulder straps and a sternum or hip strap to distribute load. Use compression sacks or small dry bags to consolidate items and reduce bulk, and place heavier items close to your back and centered for stability. Test the pack on short walks and adjust load, removing nonvital items until comfortable for longer carries.
Q: What are the vital items to include for 72-hour survival while keeping the kit minimal?
A: Include a liter of water per person in collapsible bottles plus a compact purifier or chemical tablets, a lightweight shelter (emergency bivy or small tarp and cord), a basic first-aid kit tailored to personal needs, a compact multi-tool and a small fixed-blade knife, a reliable light source with spare batteries or a crank/solar option, high-calorie lightweight food like energy bars or freeze-dried meals, and copies of ID and emergency contacts sealed in a waterproof pouch. Add weather-appropriate clothing layers, a compact heat-reflective blanket, and any necessary prescription medications in their original containers.
Q: How can I reduce weight and bulk without sacrificing capability?
A: Prioritize multi-use items such as a bandana that functions as a filter, tourniquet, or sun protection and a poncho that doubles as shelter and groundsheet. Choose ultralight versions of sleeping and shelter gear, replace glass containers with durable plastics or soft bottles, and opt for concentrated food and powdered drink mixes. Remove redundant items, test gear for true utility, and prefer consumables you can resupply from local sources when evacuating rather than carrying long-term stockpiles.
Q: How often should I check and update my go bag, and what should I inspect?
A: Inspect your bag every six months and after any use or change in health, family, or living situation. Check expiration dates on food, water treatment, and medications, replace batteries and re-seal or swap out any worn waterproofing, and verify documents and contact information are current. Practice a quick pack drill to confirm weight and accessibility, and adjust contents seasonally for clothing and weather-specific needs.