Just pack imperatives by prioritizing water, food, first-aid, light, and documents so you can act quickly during any emergency; organize items by need, test gear, and update supplies seasonally to stay ready.
Key Takeaways:
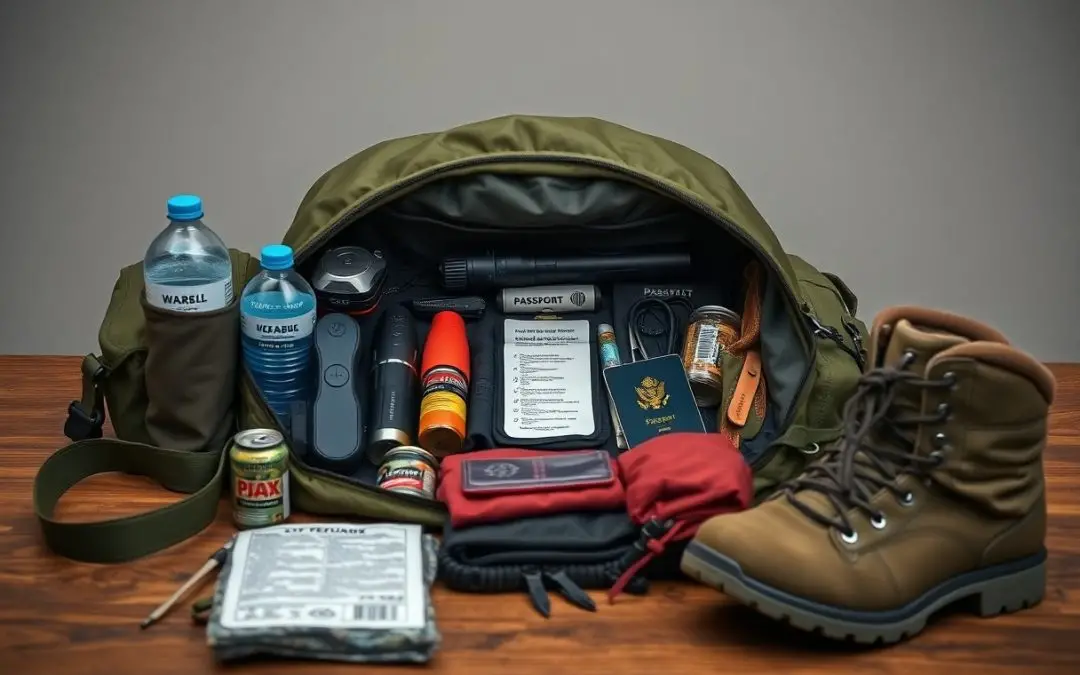
- Pack water (one gallon per person per day), three days of nonperishable food, a manual can opener, and a compact first-aid kit.
- Include shelter and warmth: emergency blanket, extra clothing, sturdy shoes, and a lightweight tarp or bivvy.
- Store copies of IDs, insurance papers, cash, and an emergency contact list in a waterproof pouch.
- Add tools and communication gear: flashlight with extra batteries, hand-crank or battery radio, multi-tool, spare phone charger, and whistle.
- Customize for personal needs: medications, baby or pet supplies, local maps, and rotate items every six months to keep supplies fresh.
Assessing Personal Needs: Critical Factors for Bag Selection
Assess your medical, mobility and caregiving requirements before choosing a bag; medications, mobility aids, baby or pet supplies and important documents determine capacity and organization. You should prioritize items you cannot replace quickly and plan pocketing so vitals are reachable under stress.
- Prescription meds and copies of prescriptions
- Identification, insurance and emergency contacts
- Water and high-calorie snacks
- Basic first-aid and hygiene supplies
- Child, infant or pet-specific items
Evaluating Environmental Risks and Duration
Consider local hazards and typical evacuation durations so you pack for heat, cold, flood or extended sheltering; think urban versus wilderness needs and seasonal shifts. You should estimate how many hours or days you may be self-sufficient and scale water, food and clothing layers accordingly.
Balancing Durability with Portability
Expect to choose a bag that protects contents while remaining comfortable for long carries; favor water-resistant fabrics, reinforced seams and padded shoulder systems without excessive weight. You should select modular compartments to distribute weight and keep heavy items close to your spine.
This approach includes test-packing and a short loaded walk to confirm comfort, replacing dense items with lighter options when possible, and using compression sacks or external pockets for quick access so you can move efficiently under pressure.
How to Organize Your Essential Survival Gear
Arrange your kit by accessibility and function so you can grab critical items without digging through layers when time is limited.
Group items into categories like hydration, first aid, and tools to speed up checks and replenishment after use.
Prioritizing Items by Frequency of Use
Keep everyday-use items such as headlamp, phone charger, and medications at the top or in external pockets for instant access.
Place bulky or seldom-used gear lower in the pack to preserve balance and reduce the need to unpack during urgent moments.
Implementing a Layered Packing System
Layer your bag into quick-access, mid-use, and emergency zones so you always know which section holds what under stress.
Label compartments or use color-coded stuffsacks to visually separate layers and speed retrieval when you’re under pressure.
Test your layered setup during drills and adjust placement based on which items you actually reach for, ensuring the system matches your real behavior.
Sustenance and Hydration Tips for Longevity
Pack at least one gallon of water per person per day for three days and add compact water bottles for mobility; include electrolyte mixes and calorie-dense snacks so you can sustain energy, and rotate items every six months to avoid surprises.
- Water – 1 gal/person/day
- Portable filter, purification tablets, UV pen
- Electrolyte packets
- Energy bars, nuts, nut butter
- Freeze-dried meals or MREs
- Multivitamin
Selecting Efficient Water Purification Methods
Choose a layered approach: a mechanical filter for sediment, chemical tablets for backup, and a UV pen for quick treatment so you cover varied contamination risks; you should practice using each method before an emergency.
Packing Nutrient-Dense, Shelf-Stable Foods
Store calorie-dense staples like nut butters, jerky, powdered milk, and dense energy bars to maximize calories per ounce while keeping preparation simple so you maintain strength during prolonged events.
Swap heavy canned goods for vacuum-sealed pouches or freeze-dried options and prefer single-serve packaging to control portions and reduce waste; you should also include a few comfort items to support morale.
Rotate your food inventory monthly and keep a written list so you can plan replacements. This prevents expired items from accumulating and keeps your go bag ready at a moment’s notice.
Shelter and Protection Strategies
You prioritize site selection: avoid flood zones, cliffs, and exposed ridges, and set up on level ground with natural windbreaks to minimize exposure.
Choose shelter systems that balance speed and durability; practice quick setups and pack redundancy so you can sustain protection when conditions change.
Essential Gear for Maintaining Core Temperature
Pack layered insulation that fits your climate: insulating hat, lightweight sleeping bag, emergency blankets, and chemical heat packs to preserve core warmth during long waits.
Core Temperature Gear
| Item | Purpose |
|---|---|
| Mylar emergency blanket | Reflects body heat to reduce radiative loss |
| Insulated hat | Reduces heat loss from the head |
| Lightweight sleeping bag | Provides core insulation overnight |
| Bivy sack | Traps heat and blocks wind |
| Chemical hand warmers | Supply localized, portable heat |
| Wool or synthetic socks | Maintain foot warmth when damp |
Lightweight Solutions for Emergency Cover
Tarp shelters let you improvise coverage quickly using cordage and stakes, giving you a low-weight, packable option for rain and wind protection.
Ultralight tarps, emergency ponchos, and silnylon bivvies allow you to shelter multiple people with minimal bulk, and you should practice pitching them solo to maximize efficiency.
First Aid and Hygiene Management
Pack a compact first aid kit with personal medications, basic wound care, and antiseptics so you can address injuries and control infection while displaced. You should check expirations and adjust contents for allergies and chronic needs.
Building a Comprehensive Medical Kit
Include adhesive bandages, sterile gauze, antibiotic ointment, tweezers, a tourniquet, and pain relievers matching your household’s needs; add prescription copies and emergency contact info. You may add a small CPR mask and any specialty items for children or pets.
Sanitation Supplies for Disease Prevention
Store hand sanitizer, biodegradable soap, disposable gloves, face masks, and heavy-duty trash bags to manage waste and reduce disease spread. You should keep separate bags for soiled items and a small supply of laundry detergent for hygiene maintenance.
Use water purification tablets, disinfectant wipes, and a collapsible washbasin when running water is unavailable, and rotate supplies periodically to maintain effectiveness.
Summing up
Now you can build a go bag that covers shelter, water, food, first aid, power, and key documents while staying compact and comfortable. Pack multiuse items, prioritize what fits your needs, and store supplies in labeled pouches for quick access.
You check and rotate items every six months, keep your bag reachable, and run simple drills so you use gear confidently when time matters.
FAQ
Q: What is a go bag and how long should it sustain me?
A: A go bag is a compact, grab-and-go emergency kit designed to support one person for at least 72 hours. Core categories include water (one gallon per person per day for drinking and minimal hygiene), nonperishable food (ready-to-eat, high-calorie items for three days), first-aid supplies, shelter and clothing layers, communication and power, tools and repair kit, personal documents and cash, and items for children or pets as needed. Aim for a backpack in the 30-45 L range so the bag stays portable while holding imperative supplies.
Q: How should I pack to keep weight manageable and make items easy to access?
A: Pack heavy items close to your spine and near the center of the bag to improve balance and reduce fatigue. Use compression sacks for clothing and sleeping gear to save space, and modular pouches to separate med kit, hygiene, electronics, and food so you can grab what you need quickly. Choose multipurpose tools such as a multi-tool, emergency blanket that doubles as shelter, and lightweight cookware that nests. Place critical items like a flashlight, first-aid kit, water filter, and important documents in external or top pockets for immediate access.
Q: What are best practices for food and water in a go bag?
A: Select high-calorie, shelf-stable foods such as energy bars, dehydrated meals, canned proteins with a can opener, and nuts or nut butters that require no cooking. Store water in durable bottles and include a lightweight filter straw or pump plus chemical purification tablets as backups. Rotate perishable items every 6-12 months and mark expiration dates on packaged foods. Pack compact cook options like a small stove and fuel if you expect to need hot food, but plan for cold meals and ready-to-eat options first.
Q: How do I handle medications, medical supplies, and important documents?
A: Keep an up-to-date list of prescriptions, dosages, and allergy information inside a waterproof pouch along with photocopies of IDs, insurance cards, and emergency contacts. Store a 7-30 day supply of prescription medications if possible, and include a letter from your doctor when traveling across regions. Pack extra glasses or contact supplies and spare batteries for medical devices. Maintain an encrypted digital copy of documents on a USB drive or secure cloud account and test accessibility before you need it.
Q: How often should I check and customize my go bag for different emergencies?
A: Inspect and update your go bag at least every six months: check food expiration dates, test and replace batteries, verify medication supplies, and swap seasonal clothing. Customize contents for local hazards such as floods, earthquakes, or extreme cold by adding items like a portable water-rescue whistle, dust masks, or insulated layers. Conduct periodic drills to carry the bag for short walks so you confirm comfort and adjust weight, and keep the bag in a designated, easily reachable location known to all household members.