You can build an efficient go bag by focusing on vitals-water, food, first aid, shelter, and important documents-tailoring contents to your health, climate, and household needs; use a straightforward checklist, modular packing, and scheduled inspections so your kit stays compact, accessible, and ready when you must leave quickly.
Understanding Emergency Go Bags
Treat a go bag as a portable 72-hour survival kit tailored to your needs; most emergency planners recommend 72 hours and include water (3 liters per person per day), three days of nonperishable food, a basic first-aid kit, flashlight, batteries, and copies of ID and prescriptions. You’ll balance imperatives against weight-aim for under 20 lb if you must carry it-and rotate perishables and meds every 6-12 months. Also prepare a small pet kit if you have animals.
What is an Emergency Go Bag?
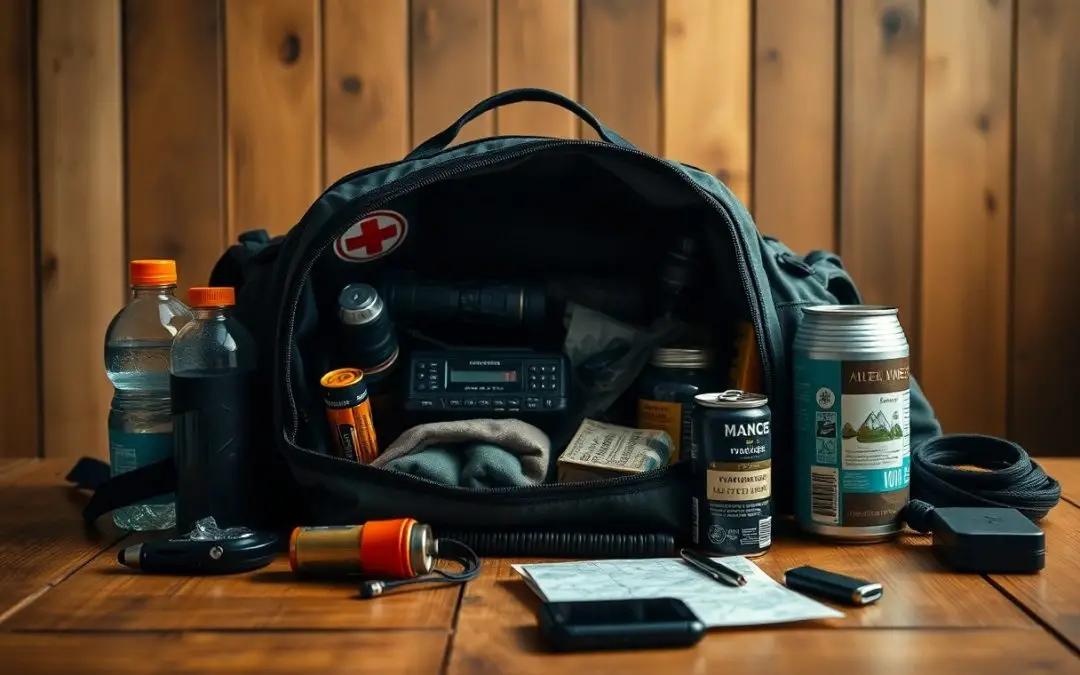
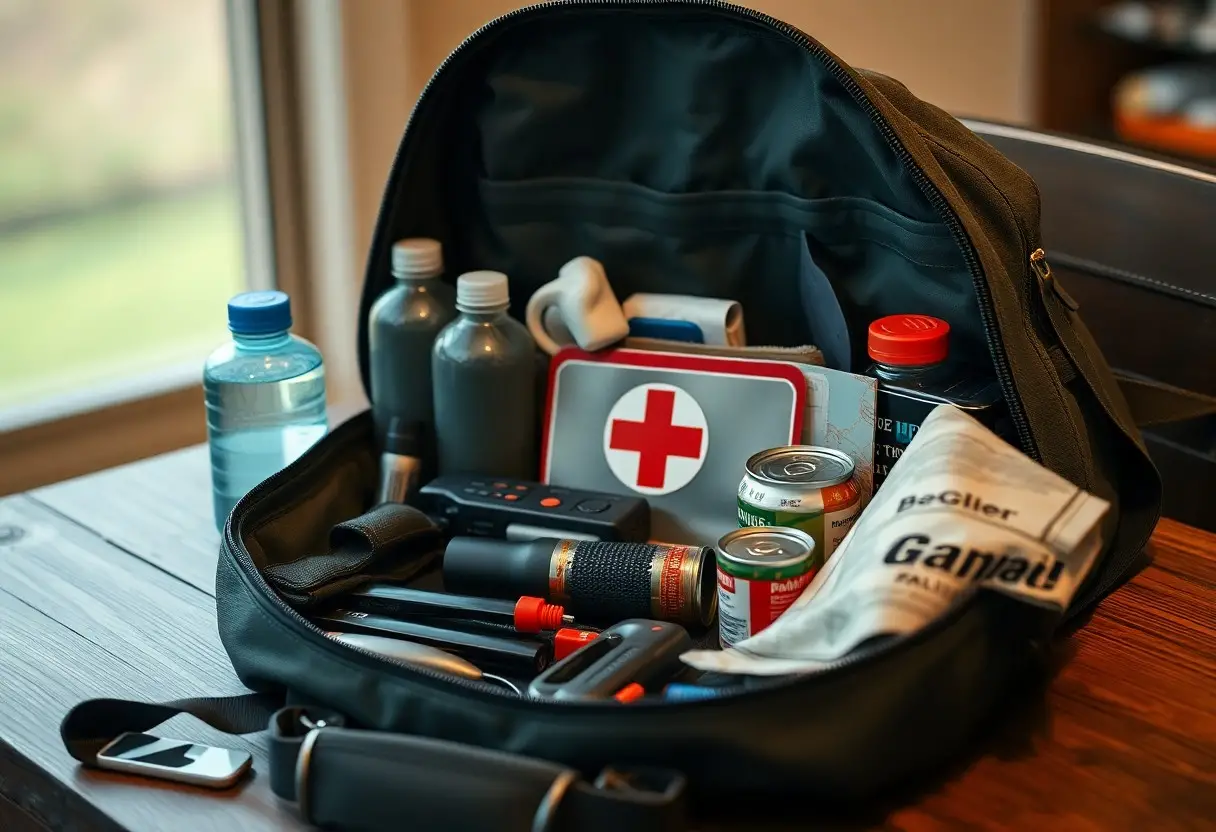
It’s a pre-packed, grab-and-go backpack (20-30 L) containing imperatives you can take within minutes: water (3 L/day/person), 72 hours of food, first-aid, radio, flashlight, extra clothes, copies of IDs, cash, and phone charger. Keep one at home, one in your car, and a compact version at work so you’re covered no matter where an evacuation starts.
Importance of Having One
You increase your self-sufficiency for the first 72 hours-FEMA recommends planning for three days-when utilities and services are often down. A ready bag cuts evacuation time, reduces stress during chaotic evacuations, and lets you assist family or neighbors while supply chains and emergency responders mobilize.
Plan your bag around vulnerabilities: if you have children, include formula and diapers for 3 days; if elderly, add extra meds and mobility aids; if you have pets, include food and a leash. Keep digital copies of IDs and a USB with photos of vital documents; store cash ($100-200) because ATMs may fail. Rotate perishables every 6-12 months and test radio and flashlight batteries biannually.
Essential Items for Your Go Bag
When assembling your go bag focus on items that sustain you for at least 72 hours while remaining lightweight and accessible. Include water (1 gallon per person per day), calorie-dense food like energy bars or MREs, a compact first-aid kit, multi-tool, flashlight with 200+ lumens, battery bank (10,000 mAh), copies of IDs and meds lists, spare cash in small bills, and a lightweight shelter such as a mylar blanket or emergency tarp.
Food and Water Supplies
You should store at least 1 gallon of water per person per day for a 72-hour period and rotate it every six months. Pack nonperishable, high-calorie options like energy bars, vacuum-sealed tuna, and MREs; add ready-to-eat meals that only need hot water such as dehydrated soups. Include a compact purifier-tablets, a LifeStraw, or a .2-micron filter-and a collapsible bottle to reduce bulk.
First Aid and Safety Gear
Put a well-stocked first-aid kit including sterile gauze, adhesive bandages, antiseptic wipes, triangular bandages, a tourniquet, SAM splint, and blister care; add 7-14 days’ worth of prescription medicines plus printed prescriptions. You’ll also want N95 masks (two), nitrile gloves, a headlamp (200+ lumens) with spare batteries, a hand-crank NOAA radio, whistle, multitool, and emergency blanket to cover common injuries and hazards.
Organize items in clear, labeled pouches so you can access bleeding control, airway, and medication sections under stress; store meds in zip-locks with expiration dates and a list of dosages. Train by taking a basic first-aid and CPR course, practice applying a tourniquet and using a SAM splint, and inspect your kit quarterly-replace expired antibiotics, epinephrine, and batteries to keep everything mission-ready.
Customizing Your Go Bag
Start by matching items to your likely scenarios and household makeup; prioritize 72 hours of supplies-about 3 liters of drinking water per person total, calorie-dense food, a basic first-aid kit, lightweight shelter, and a compact multi-tool. Aim to keep a single adult bag near 20-25 lb for mobility, swap canned goods for MREs or dehydrated meals, and include a charged 10,000 mAh power bank, cash, and photocopies of IDs and prescriptions.
Tailoring to Your Family’s Needs
If you have infants pack three days of formula, 24-36 diapers, and a portable changing pad; for children include comfort items and a copy of medical info. Add spare eyeglasses, two weeks’ worth of prescription meds when possible, and allergy supplies like an EpiPen if needed. For pets include three days of food, a collapsible bowl, and vaccination records. Rotate food and meds every 6-12 months and keep an emergency contact card handy for each family member.
Seasonal Considerations
In cold months you should include an insulated sleeping bag rated 10-20°F below expected lows, 4-6 chemical hand warmers, an extra fleece layer, and a small stove with fuel; in hot months increase water to 1-2 liters per person per day, add SPF30+ sunscreen and a cooling towel. Always pack a waterproof cover for your bag and a lightweight rain jacket year-round to handle sudden storms.
For winter, protect your electronics in waterproof pouches and carry extra batteries (4-8 AA/AAA) since cold drains power; store fuel safely and keep rock-salt or traction cleats if you face ice. If you live in hurricane or flood zones, include a compact NOAA radio, sealed document bags, and 30 ft of cord for tarps. During wildfire season prioritize N95 respirators (2 per person), eye protection, and preplanned evacuation routes; test seasonal items and swap expired supplies annually.
Maintenance and Updates
Set a recurring schedule so your go bag stays ready: perform quick visual checks every 3 months, swap perishable supplies every 6-12 months, and do a full inventory annually; update medications, phone chargers, and emergency documents after major life changes like moves or new prescriptions; adjust gear seasonally-add a lightweight shell for summer storms and insulated layers for winter-so your kit matches current risks and family needs.
Regular Check-ups
Inspect seals, zippers, and packaging every 3 months, test flashlights and portable radios, and replace alkaline or lithium batteries yearly; verify prescriptions and over-the-counter meds against expiration dates and consult your pharmacist about safe disposal; check water storage levels and taste, confirm dietary items still suit any new allergies or baby needs, and log changes so you can track what was updated and when.
Rotating Perishable Items
Adopt a FIFO rotation: place new purchases behind older stock, label items with purchase or expiry dates, and swap items into your household meal plan before they age out; expect bottled water to be refreshed every 6-12 months, canned goods often good 2-5 years, and freeze-dried meals or MREs to vary by manufacturer-track actual dates rather than guessing.
Make rotation practical by keeping a small dedicated tote for near-expiration items and setting calendar reminders on your phone every 3 months; rotate one or two meals from your go bag into regular use each month so you replace them at the store, store dry goods at 50-70°F in a dark, dry spot, and note that military MREs commonly list 3-5 year shelf lives at room temperature while commercial vacuum-sealed entrees may claim 10-25 years depending on packaging-always follow manufacturer dates and storage instructions.
Quick Grab-and-Go Strategies
Stage bags where you actually exit: front door, car trunk, and workplace locker, and keep duplicates of vital items like phone chargers and a small cash stash. Aim for 72 hours of water and food (1 gallon per person per day) and a meds/IDs packet in a waterproof sleeve. Use a visible checklist on each bag and color-coded tags to shave off seconds during a real evacuation.
Building a Plan
Map two evacuation routes from home and one from work, pick two meeting spots (primary within 1 mile, secondary outside your neighborhood), and assign roles-who grabs kids, who pets, who keys the car. Factor mobility or medical needs and list alternate contacts; update that contact list and routes every six months so the plan stays current and practical.
Practicing Your Go Bag Drill
Schedule drills at least twice a year and time them: aim to get everyone out with bags in 2-3 minutes, then run for faster targets. Conduct one daytime and one nighttime practice, rotate responsibilities, and test realistic constraints like carrying a toddler or navigating stairs with a backpack. Track results to close weak points.
Make drills scenario-based-simulate a fire, flood, or power outage-and force decision points such as whether to grab car keys or additional gear. Video one drill to spot slow steps, log pack contents and expiration dates after each test, and set calendar reminders to replace expired food, batteries, and medications. Strive to shave 10-20% off your time each drill cycle using these measurable tweaks.
Final Words
Following this guide, you can assemble and maintain a practical emergency go bag that fits your needs, prioritizes life-sustaining items, and stays compact for quick evacuation; you should audit contents periodically, adapt for weather and family needs, and practice retrieval so your response is swift and confident when an incident occurs.