This guide explains why most go bags fail and how you can fix yours quickly and effectively. You often pack on impulse, ignore weight distribution, skip regular checks, and rely on generic lists, leaving gaps when disaster strikes. You should prioritize mission-critical items, tailor gear to your local risks, organize by use, swap expired supplies, and rehearse grabbing and carrying your bag. With simple inspections and purposeful choices you turn a neglected tote into a reliable emergency kit you trust.
Understanding Why Go Bags Fail
You often assume a packed bag equals preparedness, but oversight on basics sinks most kits. FEMA recommends a 72-hour supply and 1 gallon of water per person per day, yet many bags lack adequate water, current medications, or weather-appropriate clothing. You may carry a heavy multi-tool while missing a simple water filter, and that mismatch turns a supposedly ready bag into dead weight when minutes count.
Common Mistakes to Avoid
You overload with specialty gear, forget to rotate perishables and meds, and treat one bag as suitable for every family member. Batteries die, winter layers vanish, and small-children needs like formula or spare diapers are often overlooked. Test your setup by carrying the bag 1 mile at full weight and cut items that add more than 2-5 pounds per person per day of expected evacuation.
Essential Factors for Success
You need modular pouches, redundancy for water and light, and a strict rotation schedule: water purification (tablets or a lightweight filter), a 50-100 lumen headlamp plus spare batteries, a compact multi-tool, and sealed copies of IDs and prescriptions. Rotate supplies every six months, tailor contents to local hazards, and practice use so gear isn’t just present but reliable under stress.
- Pack at least 72 hours of food and 1 gallon of water per person per day.
- Label meds with expiration dates and keep a photocopy of prescriptions in a waterproof pouch.
- After you complete a test carry, remove items you couldn’t comfortably transport for 2 miles.
You should set measurable standards: aim to keep carry weight under about 25% of your body weight, maintain a 3-day supply of prescriptions with digital backups, and include two independent light sources (for example, a 50-100 lumen headlamp plus a 500-lumen handheld). Run quarterly drills-a 30-minute blackout and a 2-mile evacuation-to validate water, shelter, comms, and navigation choices under realistic stress.
- Use clear modular pouches for food, water, meds, and shelter to speed access during evacuation.
- Store duplicate critical items (phone cord, spare SIM, small cash) in a separate grab-and-go pocket.
- After swapping expired items, record the new expiration dates on your phone calendar for the next rotation.
How to Assess Your Current Go Bag
Assess your bag by timing how long it would sustain you: aim for a 72-hour baseline-3 L water/day and 2,000-3,000 kcal/day per person-then check pack weight (10-18 lb for a go-day pack) and accessibility of key items. Note last-update dates, expiration on meds and batteries, and whether tools are operable; flag anything older than two years or single-use items that need rotation.
Inventory and Evaluation Tips
You should empty your pack, list every item, and tag condition and expiry before restocking.
- Water: 3 L/person/day for 72 hours
- Food: 2,000-3,000 kcal/day, 6+ month shelf life
- Power: ≥10,000 mAh power bank, spare cables
Knowing which items are expired, duplicated, or missing shortens restock time and prevents surprises during an emergency.
Identifying Gaps and Weaknesses
You should run a gap analysis: mark imperatives present, redundant, or absent. If you find more than three critical items missing-shelter, potable water, first aid, or light-consider the bag non-deployable and set a two-week deadline to replace them.
Test gear under realistic conditions: hike with your loaded pack carrying 10-15 lb for 20 minutes to spot fit issues; operate your stove and count usable fuel canisters; fully charge and discharge power banks to verify capacity. Prioritize fixes that affect survivability first, rotate food every 6-12 months, and log replacement dates so you can measure improvement at each review.
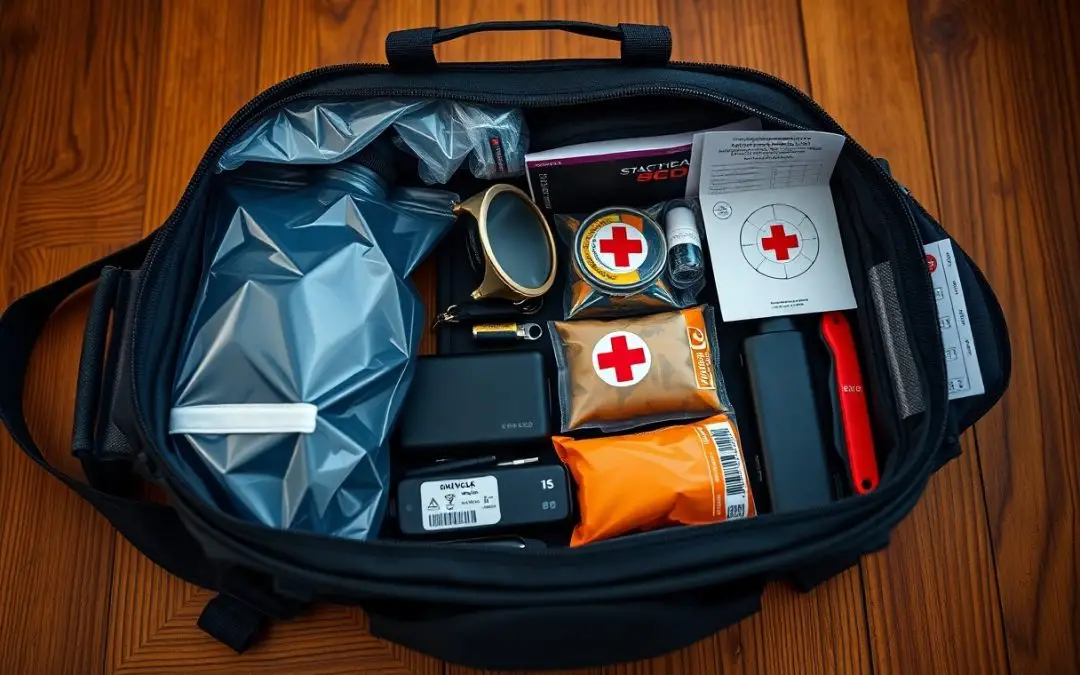
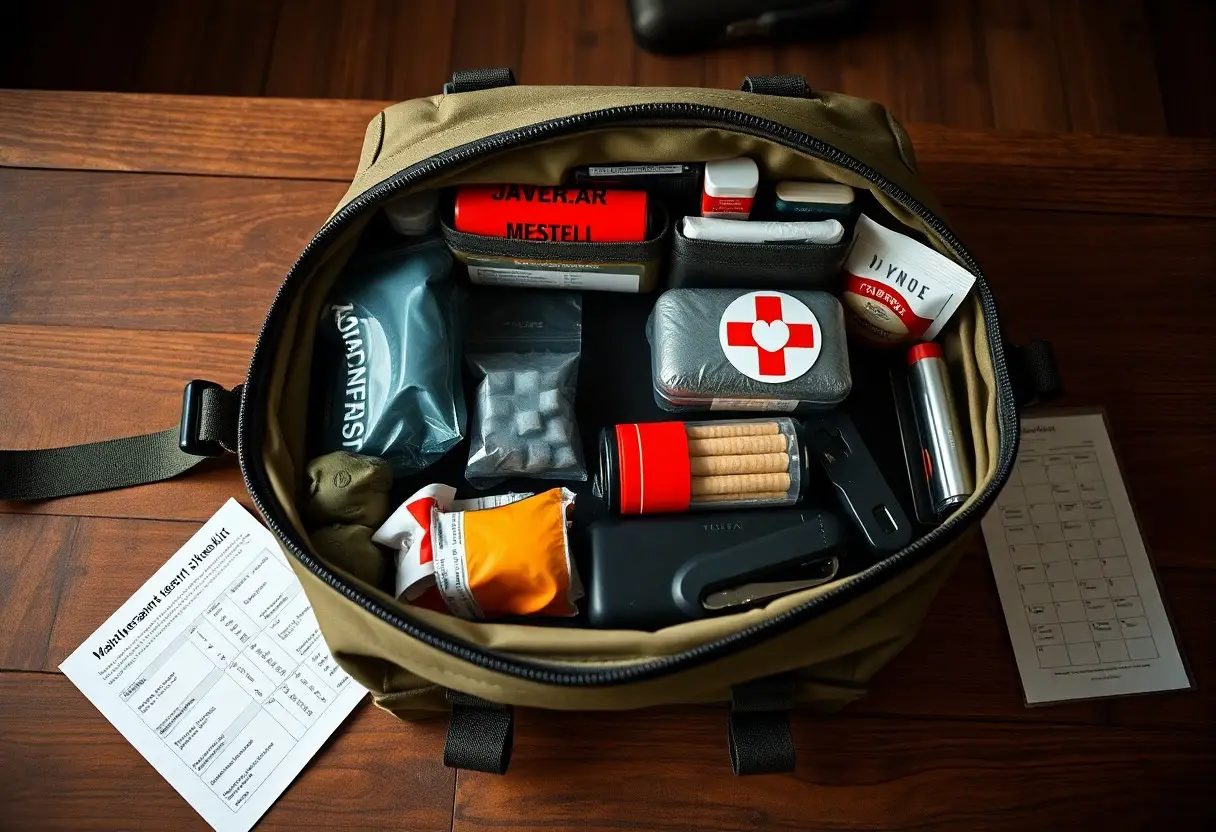
Key Items Every Go Bag Should Contain
Pack for 72-hour self-sufficiency: 3 L of water per person per day, 2,000-3,000 kcal of nonperishable food, a compact first-aid kit, and reliable light and communication options like a headlamp and NOAA weather radio. Include a multi-tool, waterproof document pouch with IDs and cash (~$200 in small bills), a 10,000-20,000 mAh power bank, and season-appropriate shelter (mylar blanket in summer, insulated bivvy in winter).
Must-Have Essentials
Include water purification (filters or 2-4 chlorine tablets), calorie-dense ready-to-eat meals (MREs or freeze-dried pouches totaling ~6,000-9,000 kcal for 72 hours), bandages, antiseptic wipes, adhesive dressings, a compact tourniquet, a fixed-blade knife, duct tape, a headlamp with 3-4 spare batteries, whistle, and a small roll of cash; these items cover most immediate survival, signaling, and minor trauma scenarios.
Customizing for Personal Needs
If you take prescription meds, pack at least a 72-hour supply plus a written medication list and pharmacy contact; for children include formula, diapers, and 3 days of snacks; pet owners need food, leash, and vaccination copy. Tailor clothing for climate-wool layers for cold, moisture-wicking for heat-and add items like spare glasses, hearing-aid batteries, or a compact CPAP battery if you rely on medical devices.
Think scenario-specific: for wildfire risk add two N95 masks and eye protection; in flood zones include waterproof boots and a small dry bag. Prepare language or medical-alert cards if you or a family member has limited English or special needs. Choose a 20,000 mAh power bank (recharges a typical phone ~4-6 times) if you depend on phone-based alerts, and rotate perishable custom items every 6-12 months to keep supplies effective.
Tips for Maintaining Your Go Bag
Set a simple schedule to inspect your bag every 3-6 months: check expiration dates, swap food and meds, run batteries through a quick test, and verify your radio and headlamp work. Use a calendar alert and jot the date on a packing list inside the bag; field tests catch failures faster than guessing. If you travel frequently, verify weight and accessibility after each trip. Thou replace one expired or outdated item at each check.
- Check water, food, and medications for expiry every 6 months
- Test electronics (radio, headlamp) monthly for 10-15 minutes
- Rotate food annually; use the oldest-first rule
- Replace batteries every 1-2 years or if voltage <1.2V for AA
- Update documents and emergency contacts annually
Regular Check-ins and Updates
Inspect your kit with a checklist: electronics and seals every three months, food and meds every six months, and clothing and documents yearly. You should log lot numbers and expiry dates, run radios and headlamps for 10-15 minutes, and record battery voltages so you spot degrading cells early. Swap prescriptions 30-60 days before expiration and note replacements inside the bag to avoid duplicate or missing meds.
Seasonal Adjustments
When seasons change, swap layers and gear to match expected conditions: add a 0°F-rated sleeping bag for cold months, use insulated bottles in winter, and carry a compact stove or chemical heat packs; in summer, prioritize breathable, moisture-wicking fabrics and extra electrolytes. You should test footwear traction and jacket breathability on a short outing before relying on them during an evacuation.
Pay attention to battery and calorie needs: lithium cells perform better in cold and should replace alkalines for winter use, while you may need an extra 300-500 calories per day in cold conditions-pack high-fat, lightweight snacks like nuts and energy bars. Store spares inside clothing to retain warmth, use silica gel for humidity control in wet seasons, and swap to quick-dry footwear for spring mud or summer storms.
Expert Recommendations
Insights from Survival Specialists
Many survival instructors push a 72-hour baseline: FEMA and CDC advise you to plan for at least three days, with one gallon (3.8 L) of water per person per day. Specialists also tell you to prioritize redundancy-two fire starters, duplicate navigation and communication tools-and to rotate perishables every 6-12 months. After Hurricane Sandy (2012) response analyses, households with layered kits and on-site purification managed outages far better.
Tried and Tested Strategies
Start by grouping gear into task-specific pouches: water, shelter, medical, and tools. You should carry 30 ft of 550 paracord, a Sawyer Mini or LifeStraw, an N95 mask, a multitool, and a 550-lumen headlamp with spare batteries. Include compact rations for a 72-hour food plan and a lightweight cook system; rotate consumables every 6-12 months to keep items usable.
Detail the layout: pack a medical kit with a tourniquet, hemostatic dressing, sterile gauze, and a SAM splint; add water treatment tablets (4-5 year shelf life), a collapsible 2 L reservoir, and two separate fire starters. You should rehearse a monthly 10-minute grab-and-go drill and label sub-pouches with dates-routine drills expose gaps and make you far quicker at assembling a deployable bag.
How to Prepare for Specific Emergencies
You must match supplies to the hazard: for earthquakes pack a dust mask, sturdy shoes, and a wrench for gas shutoff; for floods seal documents in waterproof bags and store necessarys above ground level; in wildfires include N95 masks, goggles, and a two-week supply of medications if evacuation lags; for power outages plan 72+ hours of off-grid power with a 10,000 mAh battery, solar charger, and LED lanterns rated 100+ lumens.
Tailoring Your Bag for Different Scenarios
Evacuation kits prioritize mobility-keep lightweight items, a 72-hour water/food baseline, compact sleeping bag, local map, and cash; shelter-in-place setups need longer-term sanitation, fuel for heating or cooking, and a 7-day food reserve; if you have children or pets add formula, diapers, pet food, and spare meds; assess whether you’ll need extra clothing, climbing gear, or a satellite communicator based on terrain and likely duration.
Regional Considerations and Hazards
Coastal, mountain, and plains regions require different gear: on the coast add tarps, rope, and a NOAA weather radio for storm-surge alerts; mountain areas need traction devices, extra layers, and a small shovel for snow; tornado-prone plains call for a helmet, hard-soled shoes, and a predefined interior safe room-scale water and food to expected isolation times and local emergency response speed.
Consult local hazard maps and state emergency management sites so you know likely timelines-coastal storms can cut power for weeks, so you should boost water to 7-14 days and consider a 20,000 mAh power station or portable solar panel; sign up for wireless alerts, pre-map evacuation routes, and keep digital plus waterproof physical copies of IDs, insurance, and medication lists to accelerate recovery after events like hurricanes or wildfires.
Conclusion
With these considerations you can stop common Go Bag failures: overpacking, poor maintenance, and missing imperatives. You should prioritize durable, multiuse gear, streamline items to fit your plan, rotate supplies regularly, and tailor contents to your specific risks and skills. Test your bag under realistic conditions so you know what works, then refine gear and procedures so your bag reliably supports you when it matters most.