Just grab your go bag and act with purpose-the first 24 hours after an emergency define your safety and stability. You already have the supplies; now use them wisely. Prioritize shelter, water, communication, and warmth in that order. Stay calm, assess your situation quickly, and follow a clear plan to make every item count.
Assessing the Immediate Environment and Deployment
Take stock of your surroundings the moment you exit shelter. Look for visible dangers like fire, structural damage, or unstable terrain. Identify nearby threats and safe zones quickly. Your go bag stays accessible-don’t set it down until you’ve confirmed the area is secure. Every second counts when deciding where to move next.
How to determine your first course of action
You must decide fast, but not recklessly. Check for immediate risks: smoke, flooding, or violent weather. Determine if staying put offers better protection or if evacuation is safer. Use your emergency plan as a guide, but adapt to real-time conditions. Your first move sets the tone for survival.
Factors affecting your initial transit safety
- Visibility during movement
- Presence of hazards like downed power lines
- Crowd behavior and traffic conditions
- Weather and terrain difficulty
Any delay caused by poor route choices can increase exposure. Know what blocks safe passage before you go.
Conditions on the ground shift rapidly after a disaster. Fallen trees, broken glass, or gas leaks aren’t always obvious at first glance. Listen for alarms, screams, or unusual silence-each signals something. Watch how others react, but don’t blindly follow. Stick to pre-mapped routes if passable.
- Prioritize routes with minimal debris
- Avoid areas with strong chemical odors
- Steer clear of damaged bridges or overpasses
- Use natural landmarks if GPS fails
Any uncertainty means stop, scan, and proceed with caution.
Establishing Communication and Navigation
Staying oriented and connected in the first 24 hours can determine your safety. Your go bag should include tools that help you reach emergency services and find your way without relying on unstable networks. Focus on reliable, low-tech options that work when digital systems fail.
Tips for maintaining contact with emergency services
Carry a hand-crank or battery-powered radio to receive updates and transmit your status. Program local emergency frequencies into a handheld two-way radio. Keep a written list of emergency contacts and signal protocols. This ensures you can respond quickly when conditions change.
- Use short, clear messages to conserve battery and avoid confusion
- Stick to designated check-in times to increase chances of being heard
- Signal only when necessary to prevent draining power
- This helps emergency teams locate and assist you efficiently
How to use analog navigation tools effectively
Map and compass remain your most dependable tools when GPS fails. Learn to align your compass with terrain features and identify your position using landmarks. Practice taking bearings before an emergency arises. This builds confidence when visibility drops or trails disappear.
Start by orienting your map so north on the paper matches magnetic north using your compass. Identify two visible landmarks on both the terrain and map, then draw lines from each back to your position-where they intersect is your location. Move deliberately, checking your bearing at intervals, especially when terrain shifts. This method works in fog, snow, or dense forest where digital signals falter.
Managing Shelter and Temperature Regulation
Staying protected from the elements begins with smart shelter choices and effective insulation. Your ability to maintain body heat can mean the difference between resilience and risk.
| Factor | Action |
| Elevation | Avoid low areas prone to flooding or cold air pooling |
| Wind exposure | Use natural barriers like trees or rocks to block gusts |
| Ground moisture | Insulate with a tarp or foam pad to prevent heat loss |
| Proximity to help | Balanced visibility without being in open, exposed zones |
Factors for choosing a secure temporary site
Location determines safety and comfort when sheltering. Consider drainage, overhead hazards, and access to stable ground. The right spot reduces exposure and supports recovery.
- Look for natural windbreaks like boulders or dense foliage
- Ensure the ground is level and free of debris
- Stay clear of dry riverbeds or ravines
- Check for dead branches overhead
- The site should allow quick exit if conditions change
How to deploy thermal protection layers
Start with a ground barrier to block conductive heat loss. Add insulating layers like a sleeping pad and emergency blanket, sealing in warmth. The enclosed space retains body heat more efficiently.
Begin by laying your tarp or footprint flat to create a moisture barrier. Place your insulation-such as a closed-cell foam pad-on top, then add your sleeping bag or thermal blanket. Position the reflective side of emergency blankets toward your body to reflect radiant heat. Secure edges with rocks or gear to prevent wind lift and maintain a stable microclimate around you.
Hydration and Sustenance Protocols
Staying alert and functional begins with consistent hydration and smart fueling. Your body can survive days without food, but water is non-negotiable. Begin rationing immediately and rely on trusted purification methods to avoid contamination. Every sip counts-plan accordingly.
Tips for rationing water and filtration methods
Divide your water supply into three equal parts: drinking, hygiene, and emergency use. Boil water for at least one minute or use a portable filter to make unsafe sources drinkable. UV purifiers and chemical drops are lightweight backups.
- Store water in clean, sealed containers
- Always filter before treating chemically
- Use flavor drops to improve palatability
Recognizing early signs of dehydration-dry mouth, fatigue, dark urine-can prevent serious issues before they escalate.
How to prioritize high-calorie consumption
Focus on calorie-dense foods like nuts, dried meats, and energy bars to maintain energy with minimal volume. Eat small portions at regular intervals to stabilize blood sugar. Avoid sugary snacks that cause crashes. Prioritizing nutrient-rich calories keeps your body functioning efficiently when rest and resources are limited.
High-calorie intake isn’t just about quantity-it’s about sustaining mental clarity and physical endurance. Fats deliver nine calories per gram, more than double carbs or protein, making them ideal for survival scenarios. Include peanut butter, chocolate, or olive oil packets in your go bag. Consuming these early ensures you maintain strength for critical decisions and movement when you need it most.
First Aid and Personal Hygiene Maintenance
Keeping yourself stable and clean in the first 24 hours can prevent complications. Your go bag’s first aid kit is designed for immediate response-use it wisely. Address injuries quickly, maintain hand hygiene, and manage waste properly. This supports recovery and reduces risk to yourself and others.
How to treat minor trauma under stress
Steady your breathing before acting. Clean minor cuts with antiseptic wipes, apply antibiotic ointment if available, and cover with a sterile bandage. Control bleeding with direct pressure. Stay calm-your body can heal small wounds efficiently when managed correctly. This builds confidence for handling bigger challenges ahead.
Factors for preventing infection in the field
- Clean all wounds immediately
- Use gloves when handling blood or fluids
- Disinfect tools before and after use
- Keep bandages dry and change them regularly
Exposure to dirt and sweat increases infection risk. Seal used supplies in a ziplock to avoid contaminating your kit. This limits cross-contamination and keeps your environment safer during extended uncertainty.
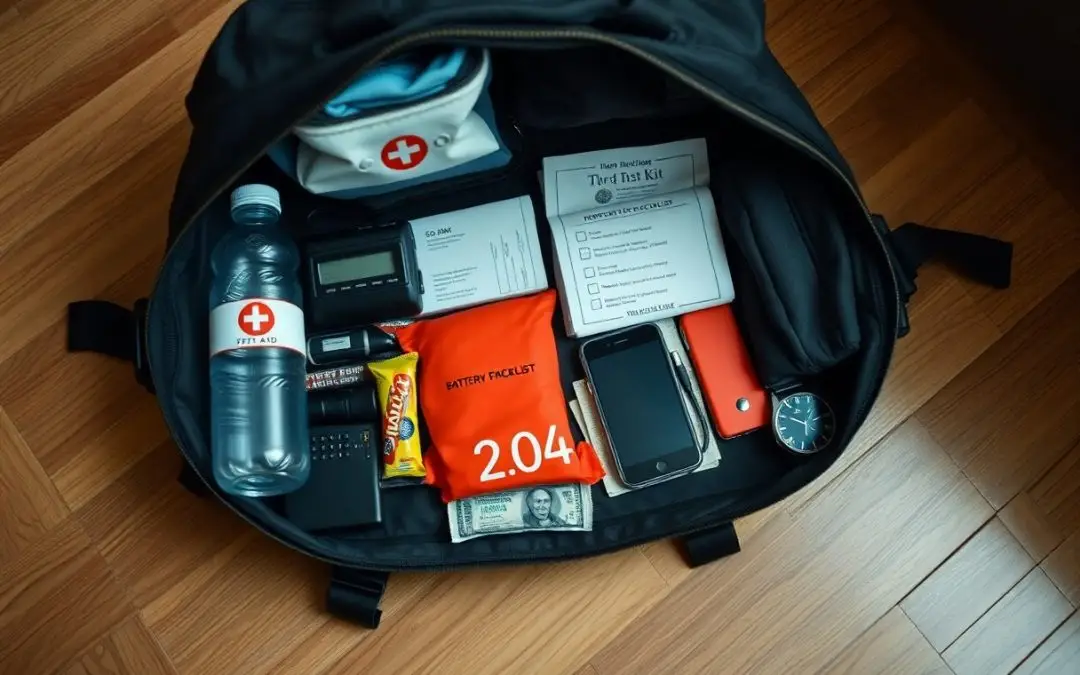
Inventory Management and Gear Readiness
Keeping your go bag functional starts with knowing what’s inside and why it matters. You need every item to serve a clear purpose, and you must be able to find it fast. A well-maintained bag reflects your readiness to respond, not just react.
Tips for organizing the bag for quick retrieval
Place frequently needed items like flashlights, first aid supplies, and communication tools in outer pockets. Use color-coded pouches for categories such as medical, food, and tools. Group similar items together and label compartments clearly. Knowing where each piece of gear lives saves time and reduces stress when seconds count.
How to audit supplies for the following day
After each use or drill, check what you’ve consumed or damaged. Replace expired food, used medical items, and drained batteries immediately. Restocking now ensures you’re never caught unprepared. Knowing your bag is fully equipped builds real confidence.
Auditing your supplies isn’t just about replacing what’s missing-it’s about evaluating what worked and what didn’t. Did the flashlight last through the night? Was the emergency blanket too bulky? Use this time to refine your loadout based on real conditions, not assumptions. Adjustments made now could make a critical difference later. Knowing your gear’s limits before you need it most is what separates preparedness from guesswork.
Final Words
To wrap up, your go bag is only effective if you use it wisely in the first 24 hours. You know where your supplies are and what you need most-stay calm, prioritize safety, water, and communication, and act with purpose. Your preparation means you’re already ahead. Make every item and every minute count.